Apple’s Development Console explained (Part 2)
Creating a certificate
First we need to decide what kind of certificate we need, In this tutorial I will explain only the Distribution certificate, the others has just about the same basic setup.
NOTE: if you don’t know the meaning of having a Certificate please start by reading my previous article that explains it. LINK
Generate a “certSigningRequest” file
Step 1 — open the “Keychain Access” app, then on to top menu tap on Keychain Access => Certificate Assistant => Request a Certificate From a Certificate Authority…

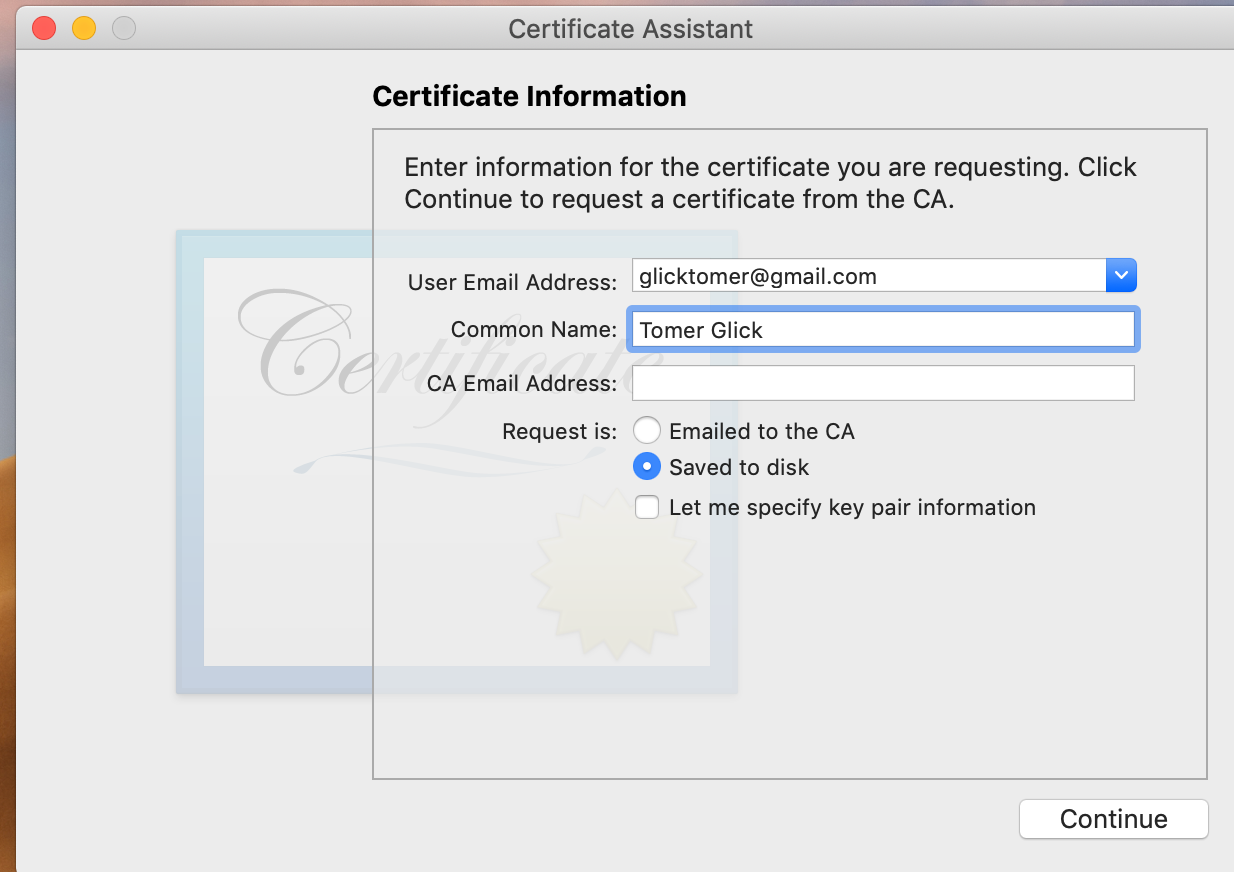
Step 2 — fill in your email and name, check the “Saved to disk” option, tap on continue and save the file on your desktop. proceed to Step 3

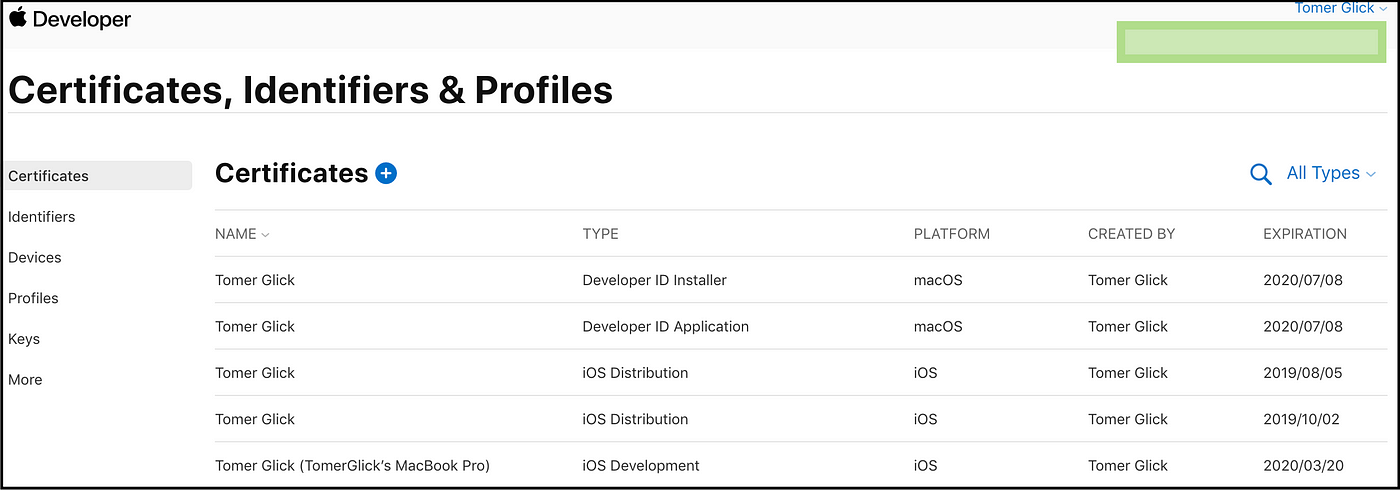
Step 3 — On the web, Login to your Apple developers console, and navigate to the certificates page. Tap the blue plus button (+)

Step4 — Follow the following quick steps- Choose iOS Distribution, Tap Continue, Choose your previously created file from your desktop, Tap Continue,
Step 5 — The Certificate is now ready, you should choose download, and then double click the file to install it to your Keychain.


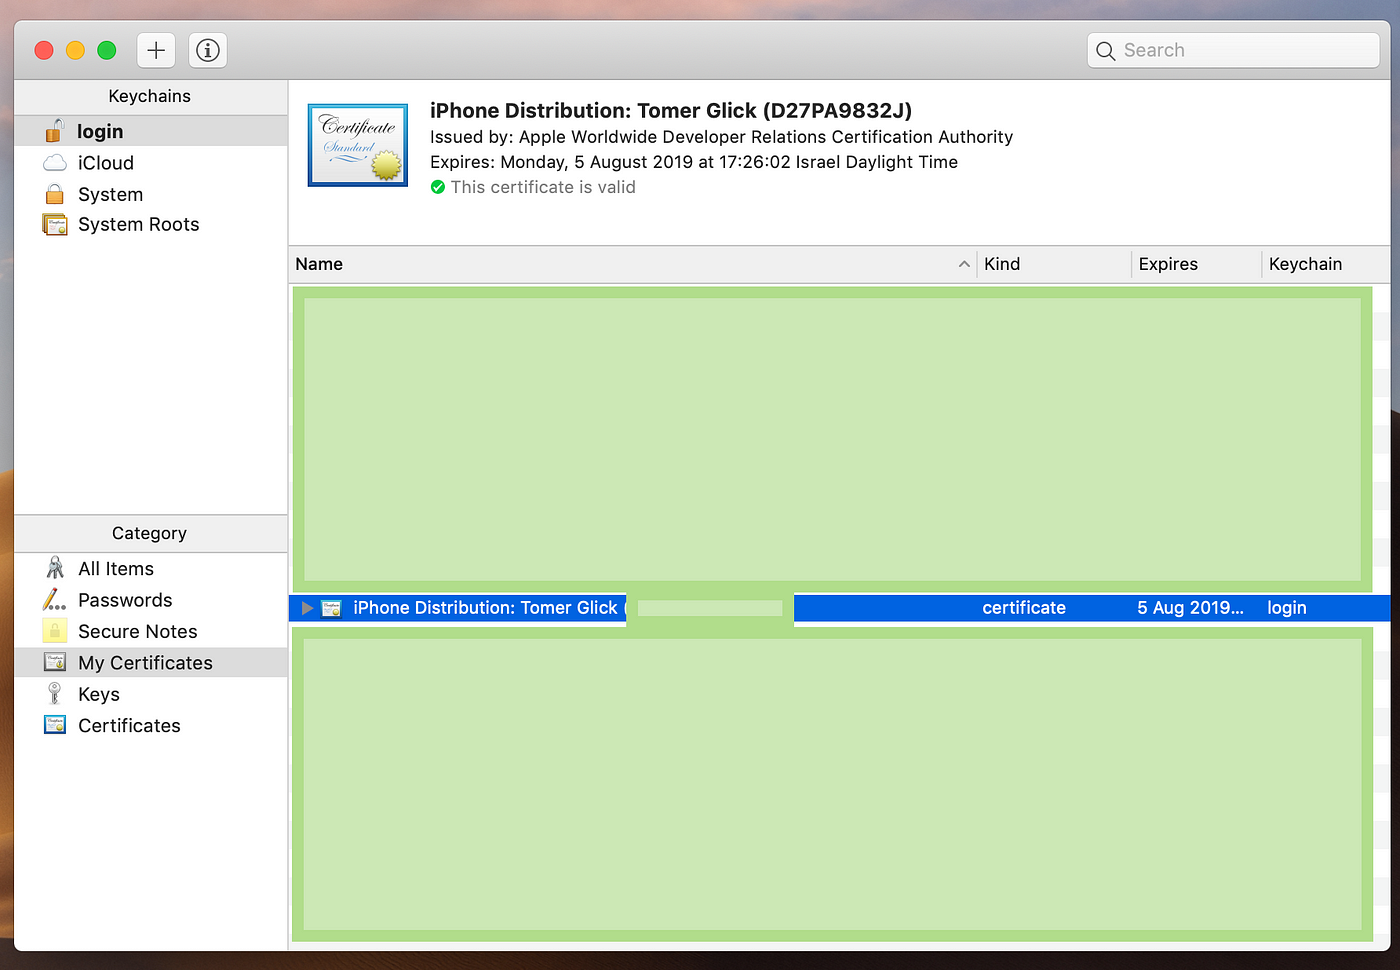
Step 6 Finally — If all done correctly, you should see your new certificate on the Keychain panel.

I hope you enjoy this reading,
Tomer


Comments
Post a Comment